Request Settings
Click the Request tab and set the request details.
|
Parameter |
Description |
|---|---|
|
SQL Statement |
Write down the SQL Statement you wish to run on the database. Depending on the permissions granted to the SQL Server user, you can select, update, insert, delete data, or execute stored procedures, functions, etc. In DRUID 8.15 and higher, use [[<request entity>]].PageInfo.SelectedFields to access the dynamic list of visible columns in the entity’s web view. For hybrid and on-premise deployments, this feature requires both the DRUID Connector Host and DRUID Data Service to be upgraded to version 8.15 or later. |
|
Use it when you want to iterate the request statements for each element in the request entity. For example, you have all leave request for a certain employee stored in [[Employee]].LeaveRequests (“Entity List” type field), and you want to insert the leave request in a database table (one by one, not by using bulk insert). Using the JSON Path Expression $.[[Employee]].LeaveRequests[*] in this field will make the connector run the task for each element in the $.[[Employee]].LeaveRequests collection. You can check your JSON Path expression using the JSON Path online evaluator. |
|
| Scope |
Allows you to define the context for the integration task. Global means that the integration will be performed on the Request entity set on the connector action. If you want to perform an integration task on a context different from the global context set on the connector action, than from the Scope field, select Local and from the Request entity field, select the desired entity. Using the Local scope, you do all related queries directly inside the connector action instead of building a larger context outside the connector action via additional queries within the Flow Designer to put data inside the request entity and then send the data back to the connector action. NOTE: The Scope field is available in DRUID 5.26 and higher.
|
|
Request Entity |
Read-only. It is used to pass input data to the SQL calls. This field is automatically fill-in with the request entity specified on the Connector Action set. You refer this entity in all the Fields mapping on the Request tab. |
|
Command timeout |
Set the time in seconds to wait for the SQL statement to execute. The default is 30 seconds and CANNOT be exceeded! |
Mapping request fields
In the Request parameters table, map the request parameters / variables you used in the SQL statement with the conversation context available in the Request Entity.
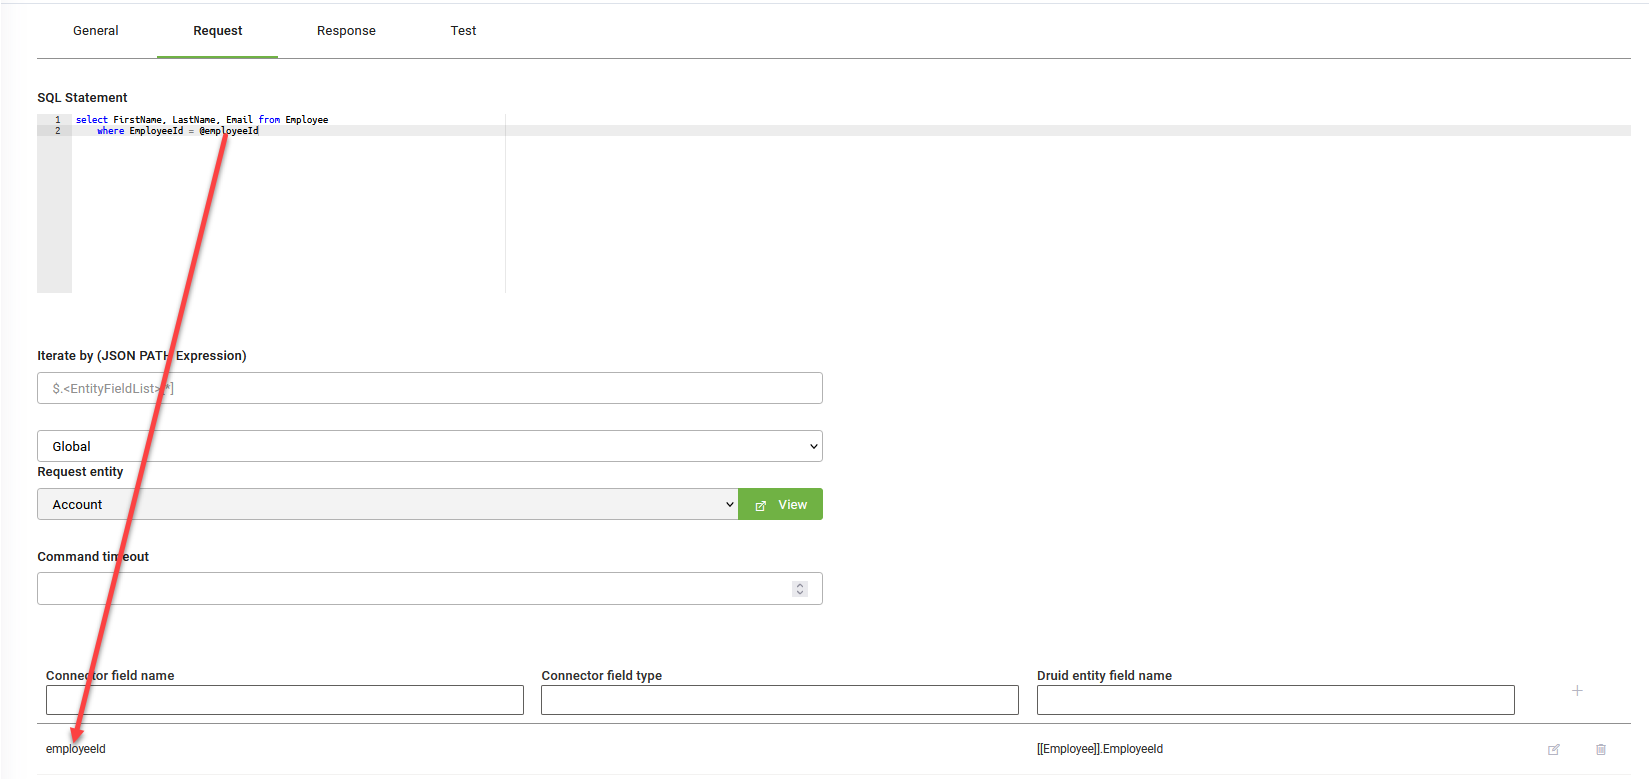
In order to map data from the Druid Request Entity to the SQL statement, a transport variable will be used, both in the SQL statement and in the mapping table, as indicated in the example above.
The variable must be preceded by “@” character, when mentioned in the SQL statement. Add a new line in the mapping table. In the Connector field Nnme column, write the name of “transport” variable (without @), and in the Druid entity field name column, select the corresponding Druid entity field (where the request data is stored).
In order to properly fill in the Druid entity field name field, type “[[“, in the Druid entity field name field, choose the Request entity from the drop-down, type “.” after the closing brackets ]] and choose the correct entity field from the new drop-down that appears. Click the Save icon displayed inline.
Click the Save button. Now you need to set up the response as well.
Inserting tables into an Oracle database
To insert files into an Oracle database, use the following SQL statement making sure to replace ' <table name>' with the name of your Oracle table:
INSERT INTO <table name> (id, blob_data) VALUES (:id, :blob_data)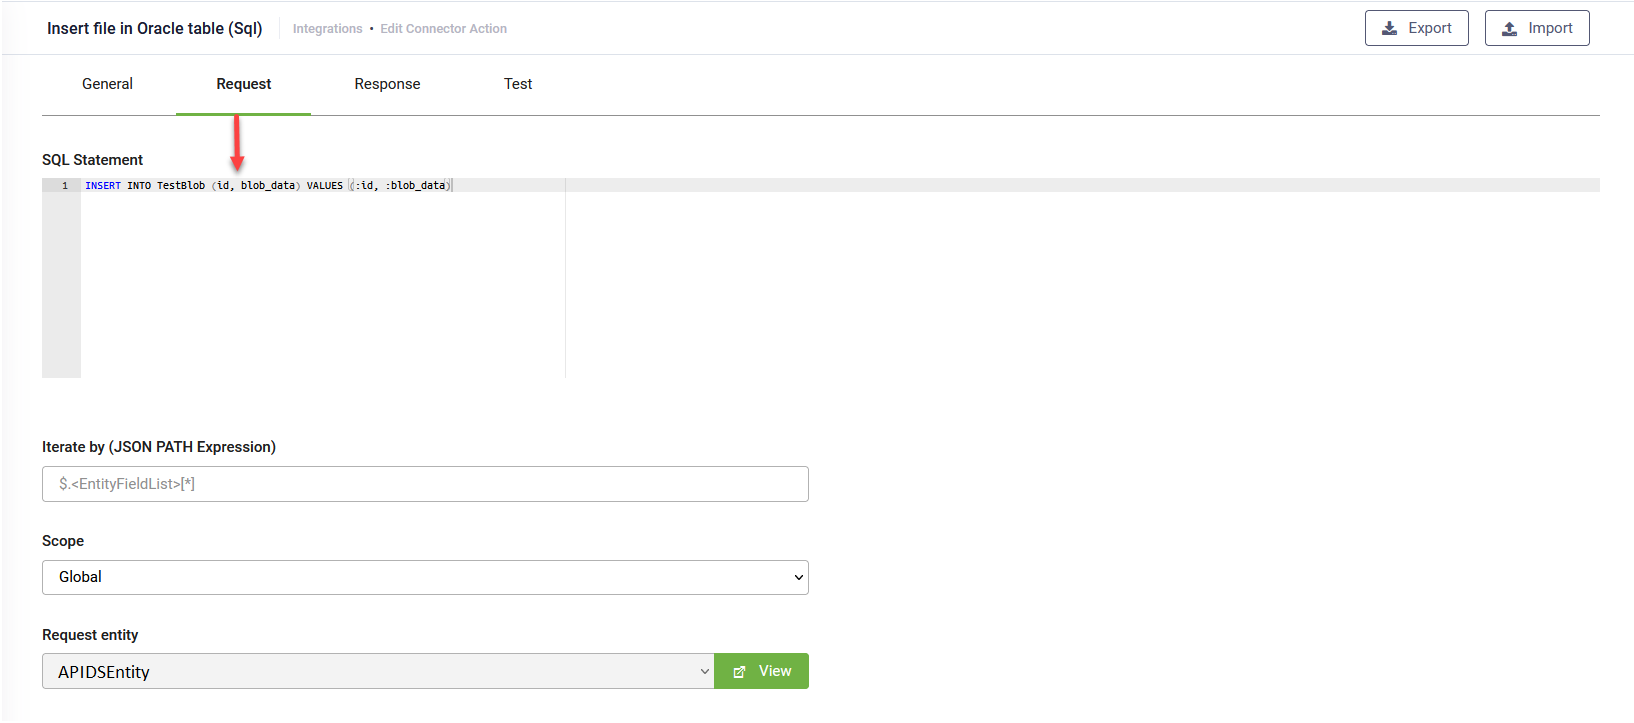
Map the blob_data field to the DRUID entity field that stores the file you want to insert in the Oracle database using the filecontent() function using the following syntax:
filecontent([[<entity_name>]].FieldName.Name)